
Homemade Yogurt
Posted: 22 January 2012 Filed under: Homemade Yogurt, Uncategorized | Tags: booteh_recipes, food_photography, homemade_yogurt, maast 3 CommentsMaking yogurt at home sure saves me money, tastes wonderfully fresh, and benefits the environment. But the main reason I do it is that it makes me so incredibly proud of my creation! Try it a few times and you’ll know what I mean!
 To make yogurt from milk, basically you ferment milk with specific types of bacteria – a long process involving several steps, but extremely easy and fun. First off, you need to have a “starter” which could either be commercial starters available in health food stores (with complete usage instructions imprinted on them), or a small amount of a store-bought natural plain yogurt. If you go with the latter, as I always do, check the yogurt’s label and make sure it contains “live” bacteria. The fresher the yogurt, the better your homemade yogurt will turn (don’t use a yogurt close to its expiry date). Also, note that once you make yogurt at home, you could put a small amount aside for the next batch and repeat this cycle for 5-6 times. After that, you would probably need to buy a new container of plain yogurt. Start with a small amount of milk/yogurt (suggested in this recipe) and once you get a hang of it, increase the amount in proportions. Here are the materials you need:
Required material: Plain yogurt, 2 tbsp. Take it out of the fridge at least half an hour before you start working so that it comes to room temperature. Milk,1 liter. Any fat variety will do. For example, 1 liter of 2% milk will give you almost 750 gr. 2% yogurt. A medium size pot. A table spoon. A glass jar or plastic tub (yogurt containers are perfect). A large clean towel. .The following two items are very helpful to have but not absolutely necessary: a candy thermometer, and an electric warming pad.
 Sterilize your equipment (and do it each time you make yogurt) Fill the pot with tab water and bring to boil on high heat. Stick your spoon and thermometer in the boiling water for a few minutes. Empty the pot and let them air dry on the stove surface – completely dry!

Heat the milk. Pour milk in the pot and warm it over medium to low heat (without much stirring) until it gets to a temperature of 185 F (85 C) so that bad bacteria are dead. Here is where a thermometer becomes very handy. But don’t worry if you don’t have it. My father used to make yogurt all the time without ever using it and I bet your parents did too! When the bubbles appear on the surface just as it starts to boil it is at required temperature.
 Cool the milk and add starter: Remove the pot from the heat and set aside on the kitchen counter. Let the thermometer stay in though. You need to cool milk down to a temperature of between 100 to120F (37.7 to 48.8C) – range within which the live bacteria will ferment the milk. This is a fairly wide range, and you really need to experiment with different heat levels to find out which temperature gives the best result for you, given other playing factors. I usually let it drop to 105 knowing that by the time I add the starter and transfer it to the container it gets to almost 100 which results in a thickness in yogurt I like best. If I leave the pot on my counter it takes about 45 minutes for the milk to get to105F. Not having a thermometer for this step is a bit trickier, but still quite manageable. The milk should feel warm on your wrist but not uncomfortably hot. Go with your senses and you cannot be that off. Once the milk is around let’s say 105F, gently but thoroughly stir in yogurt. Immediately transfer milk to the plastic tub (or glass jar) which has already been washed and dried. Cover with lid and move it to a warm place explained in the next step.

Incubate: For the next 5-8 hours, your soon to be yogurt needs to sleep, absolutely undisturbed, in a comfortably warm bed. The goal here is to keep the tub at a temperature of 100-120 F. because the live bacteria becomes inactive at a lower or higher temperature resulting in a runny or sour yogurt. There are several ways to maintain a constant suitable heat. What I do is I wrap the pot in two layers of towel and sit it on an electric warming pad placed on a wooden chair. Now, in winter (quite cold in Montreal, as I am sure you know!) I turn the pad to medium heat and place the chair next to the heating vent grill and then cover the chair with an extra blanket, while in summer I simply wrap it in a blanket and place it at a cozy warm corner anywhere. It is crucial that the whole bed setting along with the yogurt’s container be undisturbed, especially during the first 4 hours. So, don’t move it, don’t peek. Just wait and see! A couple of other ways to keep the heat in: place the wrapped yogurt’s container or jar in a picnic cooler close to a large pot of hot water, or wrap it and place it in the boiler closet. If you’re using glass jar, don’t warp it at all and place it in an oven warmed by the pilot alone.


Refrigerate: At the end of wait period, around 7 hours, unwrap the container and remove the lid. What you should be seeing is a fairly solid yogurt, with a greenish liquid on top. That’s just perfect! Put back the lid and place the pot in the freezer for about an hour. Then move it to the coldest section of the refrigerator (you could skip the freezer stage, but it does help to get a more consistent yogurt texture).


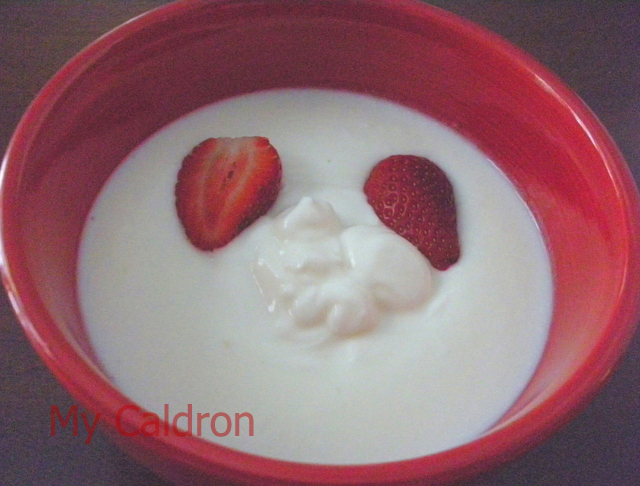
The yogurt gets more solid in the next 12 hours. Enjoy your creation while it’s fresh! But before doing so, don’t forget to set aside two tbsp. in a little sterilized container as the starter for your next batch.


سلام بوته جان از شما تشکر میکنم که اینقدر کامل توضیح دادید که جای هیچ سئوالی نگذاشتید . من همین امروز ماست را درست میکنم و فردا نتیجه آن را برای شما میگویم . فقط یک خواهش داشتم لطفا به من بگویید که نام مایه پنیر به انگلیسی چی میشه و از کجا میتونم آن را تهیه کنم چون دوست دارم پنیر هم درست کنم . بسیار سپاسگزارم
سلام دوست عزیز من دیروز ماست درست کردم طبق دستور العمل شما . بسیار عالی شد هم سفت هم خوشمزه اما یک اشکال بزرگ داره این که خیلی کش میاد . آیا شما هم درست میکنید کش میاد ؟ میشه راهنمایی کنید که چکار کنم که کش نیاد چون اصلا نمیتونم از این ماست بخورم .
سلام سیمین جان. من هیچوقت با چنین مشکلی برخورد نکردم که ماست کش دار باشه زیاد از حد! در واقعی اکثرا ماستشون آبکی میشه و دلشون میخواد کش بیاد 🙂 آنچه مسلمه با یک دفعه امتحان کردن نتیجه ایده آل بدست نمیاد. شما خودتون توی همون حواشیی دستور العمل با مقدار کم شیر کمی مراحل و دما و زمان رو بالا پایین کنید تا اشکال کار رو پیدا بشه. بعنوان مثال شاید اگه از یک نوع ماست دیگر به عنوان “مایه” ماست استفاده کنید بد نباشه. موفق باشید
حالا تا شما راه اینو پیدا کنی من هم میگردم ببینم مایه پنیر چی هست اینجاها 🙂